Install Arch Linux on Raspberry Pi
17 Jun 2016Currently neither Raspberry Pi nor the Arch Linux ARM website offer an image ready for use of Arch Linux for Raspberry Pi. So i followed this steps on Linux (in my case another Raspberry with a USB Pen Drive):
-
Download the image for Raspberry Pi (ARM).
wget http://archlinuxarm.org/os/ArchLinuxARM-rpi-2-latest.tar.gz -
Create a image file of 2GB:
dd if=/dev/zero of=arch.img bs=1M count=1850 count=1850 1850+0 records in 1850+0 records out 1939865600 bytes (1.9 GB, 1.8 GiB) copied, 53.2323 s, 36.4 MB/s -
fdisk arch.img- Type o. This will clear out any partitions on the drive.
- Type p to list partitions. There should be no partitions left.
- Type n, then p for primary, 1 for the first partition on the drive, press ENTER to accept the default first sector, then type +100M for the last sector.
- Type t, then c to set the first partition to type W95 FAT32 (LBA).
- Type n, then p for primary, 2 for the second partition on the drive, and then press ENTER twice to accept the default first and last sector.
- Write the partition table and exit by typing w.
-
Check the partitions created:
fdisk -l arch.img Device Boot Start End Sectors Size Id Type arch.img1 2048 206847 204800 100M c W95 FAT32 (LBA) arch.img2 206848 3788799 3581952 1.7G 83 Linux -
Mount the boot partition 1:
sudo losetup -v -f -o $((2048 * 512)) --sizelimit 104857600 arch.img -
Mount the root partition:
sudo losetup -v -f -o $((206848 * 512)) --sizelimit 1833959424 arch.img sudo fdisk -l /dev/loop0 Disk /dev/loop0: 100 MiB, 104857600 bytes, 204800 sectors sudo fdisk -l /dev/loop1 Disk /dev/loop1: 1.7 GiB, 1833959424 bytes, 3581952 sectors -
Format and mount boot partition
sudo mkfs.vfat /dev/loop0 mkdir boot sudo mount /dev/loop0 boot -
Format and mount root partition
sudo mkfs.ext4 /dev/loop1 mkdir root sudo mount /dev/loop1 root -
Extract image files:
sudo bsdtar -xpf ArchLinuxARM-rpi-2-latest.tar.gz -C root sync -
Copy boot files:
sudo mv root/boot/* boot sync -
Unmount partitions:
sudo umount boot root rmdir boot root -
Detach partitions:
sudo losetup -d /dev/loop0

sudo losetup -d /dev/loop1
The image is ready!!
Now I copy it to my windows:
"C:\Program Files (x86)"\PuTTY\pscp pi@192.168.1.110:/mnt/usbdrive/archlinux/arch.img "C:\tmp"
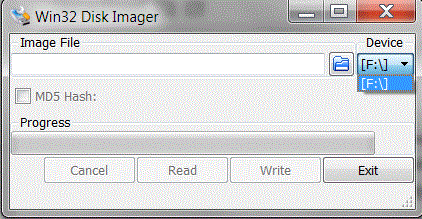
Then we can write it on SD card with Win32DiskImager utility.

Insert the SD card into the Raspberry Pi, connect ethernet, and apply 5V power.
- Login as the default user alarm with the password alarm.
- The default root password is root.
References
- http://blog.schertel.co/posts/2015/08/arch-linux-arm-image-for-raspberry-pi/
- http://elinux.org/ArchLinux_Install_Guide
